
In This Article
Infrared sauna panels for diy closet conversion are flat carbon or ceramic heating panels that you mount inside a framed, insulated closet to turn it into a compact infrared sauna. Instead of heating the air like a traditional stove, they radiate heat straight at your body. Per Haven of Heat’s kit guide, that lets a small, well-sealed closet run around 120-150°F instead of the 160-200°F of a traditional sauna.
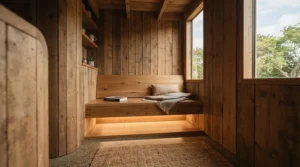
The appeal is obvious. You already own the walls, the door, and probably an outlet within reach. The rest is panels, a controller, some wood, and a weekend you’d otherwise spend scrolling.
But shopping for infrared sauna panels for diy closet conversion is oddly treacherous. Some panels arrive with a controller and a timer. Others arrive as a naked heating plate with no plug and no brains. Some need a 240V circuit. A few specialty brands were swept up in a federal fire-hazard recall this fall. Meanwhile, the health claims on most spa-style websites run well ahead of the research. Wikipedia’s overview of infrared saunas is a sobering read on that point.
So here’s the plan. I compared seven real panel options using current specs and what’s publicly documented. I’m not claiming hands-on testing, and where I couldn’t verify buyer reviews, I say so. Then I walk you through layout, wiring, frame building, and the mistakes that sink closet builds. Prices appear as tiers rather than exact numbers, because they move constantly.
Quick Comparison: Infrared Sauna Panels for DIY Closet Conversion at a Glance
Here’s the whole field on one screen. “Controller in box” matters more than it looks, as you’ll see below.
| Product | Panel Type | Output / Voltage | Controller in Box? | Best For |
|---|---|---|---|---|
| Finnmark Spectrum+ Ceramic Kit | Ceramic, recessed | Room kits from 1,500W (3′ x 3′, 120V) | Yes, WiFi touchscreen | Finished look, long warranty |
| Finnmark Spectrum Carbon Kit | Carbon, surface-mount cedar frames | 240V | Yes, WiFi | Larger closets with an electrician |
| Haven of Heat 120V Carbon Panel Package | Carbon, 300W each, 20″ x 32″ | 120V | Yes, 60-minute mechanical timer | Plug-in simplicity |
| iDOTODO 300W Carbon Plate | Carbon plate, wood frame | 300W, 120V | No | Budget builders with wiring skills |
| iDOTODO 250W Carbon Crystal Panel | Carbon crystal, hemlock frame | 250W, 120V | No | Fine-tuning circuit load |
| iDOTODO 150W Carbon Plate | Compact carbon plate | 150W, 120V | No | Calf and under-bench zones |
| Woanger 350W Carbon Fiber Glass Tube Panels | Glass tube with reflector | 350W each, confirm voltage on listing | No | Tube-style or replacement builds |
Look at the “Controller in Box?” column first. The two Finnmark kits and the Haven of Heat 120V Carbon Panel Package are closer to complete systems. The three iDOTODO plates and the Woanger 350W Carbon Fiber Glass Tube Panels are components, and you supply the brain and the safe wiring. That’s fine if you’re comfortable with it, but it changes the real cost of the project. For most closet builders, the Haven of Heat 120V Carbon Panel Package is the lowest-friction start, and the Finnmark Spectrum+ Ceramic Kit is the most polished.
💬 Just one click — help others make better buying decisions too!😊
Top 7 Infrared Sauna Panels for DIY Closet Conversion: Expert Analysis
1. Finnmark Spectrum+ Ceramic Kit — recessed look with a lifetime heater warranty
The standout feature is the install style. These ceramic panels recess between standard 2×4 studs, so the heaters sit flush instead of eating cabin depth. In a closet, losing two or three inches on every wall is a real tax, and recessing gives that space back.
Here’s what the specs mean in practice. Room kits ship as matched sets. A 3′ x 3′ kit lists five heaters, 1,500W, 120V and about 12.5A. A 4′ x 4′ kit lists seven heaters on a 20A cable. The WiFi touchscreen controller tops out at 170°F with sessions up to 60 minutes. The listing cites UL-listed elements, ETL-certified power supplies, and 30,000+ hours of rated life. The maker also claims far deeper penetration than carbon panels. Treat that as a manufacturer claim until independent data appears.
Based on the spec comparison, this is the pick for someone who wants a finished look and a warranty, and who has a stud cavity that can take the 3 inches of clearance.
Reviewer sentiment: I couldn’t verify a meaningful pool of independent buyer reviews, so I won’t characterize one. What is verifiable is the lifetime heater warranty and the certifications.
Pros:
- ✅ Recessed panels preserve scarce closet depth
- ✅ Controller, sensor, and power supply included
- ✅ Lifetime warranty on the heaters
Cons:
- ❌ Needs stud-bay framing work and 3 inches of clearance
- ❌ Premium-tier cost for a closet-sized build
Price tier: premium; check current price. It’s worth it if the finish matters to you, but it’s overkill if you just want warm.
2. Finnmark Spectrum Carbon Kit — surface-mount cedar frames and a 10-year warranty
This kit’s hook is the surface mounting. The panels arrive in Western Canadian cedar frames with mounting clips, so you screw them to the wall surface and don’t open up a single stud bay. If your closet walls are finished and you’d rather not tear into them, that’s a genuine advantage.
The kit runs on 240V with WiFi control and carries a 10-year limited warranty on panels and electronics. It is not compatible with traditional sauna heaters. That matters only if you dream of a future hybrid build, and the ceramic kit above handles that better.
What the spec sheet won’t tell you is the electrical headache. A new 240V circuit typically means an electrician and often a permit. That adds cost and lead time, and you should plan around it.
Reviewer sentiment: again, I couldn’t find enough verified buyer reviews to summarize honestly, so I’m leaving that blank rather than inventing it.
Pros:
- ✅ Surface-mount frames skip the stud-bay work
- ✅ 10-year limited warranty on panels and electronics
- ✅ WiFi controller included
Cons:
- ❌ 240V wiring adds electrician cost
- ❌ No hybrid compatibility with traditional heaters
Price tier: premium. The value verdict hinges on whether you already have 240V nearby.
3. Haven of Heat 120V Carbon Panel Package — closest thing to plug-in simplicity
This one is for people who don’t want to build a control system. The 120V package pairs 300W carbon panels (20″ x 32″ x 1″) with a 60-minute mechanical countdown timer. You choose from 1 to 12 panels. The sizing rule from the seller is a minimum of 15W per cubic foot.
Run the closet math. A 3′ x 4′ x 6′ space is 72 cubic feet, which calls for roughly 1,080W, or four 300W panels. The seller’s circuit guidance is clear. One to four panels run on a 120V/15A circuit with #14 AWG wire. Five or six need 120V/20A with #12 AWG. Seven or more require 240V and a contactor box. The listing also notes a high-limit temperature sensor in the package family.
Honest take: a mechanical timer is simple and hard to break, but it’s less precise than a digital thermostat. For a first closet build, simple wins.
Reviewer sentiment: I couldn’t verify independent buyer reviews, so I rely on documented specs here.
Pros:
- ✅ Timer and wiring-ready panels in one package
- ✅ Clear circuit guidance by panel count
- ✅ Scales from 1 to 12 panels
Cons:
- ❌ Mechanical timer offers coarse temperature control
- ❌ Sold by a specialty retailer, so availability may vary
Price tier: mid-range; check current price. Strong value if you want fewer decisions.
4. iDOTODO 300W Carbon Plate — biggest budget plate for wall coverage
The standout is size per dollar. The 300W carbon plate measures 37″ x 13.38″ x 1.18″ in a wooden frame. It’s tall and narrow, which suits the slim walls of a closet.
Here’s the catch buyers must absorb. Roundup sites repeatedly note that it ships with no plug and no controller. It’s a component for a custom system, and it requires an electrician or a compatible control panel. That’s not a flaw so much as a job description.
Based on specs, it’s a good fit for a builder who already knows how to wire a controller, or who is paying an electrician anyway. Four plates draw 1,200W, or 10A at 120V, which sits inside the 12A continuous limit of a 15A circuit.
Reviewer sentiment: I couldn’t verify review text on the listing. I also couldn’t confirm a safety certification from my research, so check the listing for UL or ETL marks before you buy.
Pros:
- ✅ High output per panel at a budget-tier cost
- ✅ Slim shape fits narrow closet walls
- ✅ Wood frame ready for surface mounting
Cons:
- ❌ No plug or controller included
- ❌ Certification details need your own verification
Price tier: budget. The panel is cheap, but budget the controller and electrician too.
5. iDOTODO 250W Carbon Crystal Panel — handy middle wattage for circuit math
The standout is flexibility. At 250W with a hemlock wood frame and mounting screws included, it fills the gap between the 150W and 300W options.
Why does that matter? Circuit math. A 15A circuit supports about 12A continuous, roughly 1,440W at 120V. Five 300W panels total 1,500W and bust that limit. Five 250W panels total 1,250W and don’t. Sometimes the in-between panel is exactly what lets you hit your coverage target without upgrading the circuit.
Roundup sites position it as a replacement or upgrade part for 120V systems. Like its siblings, expect to supply the controller and wiring.
Reviewer sentiment: I couldn’t verify independent review text. Treat any roundup star rating as directional only.
Pros:
- ✅ Mid-size wattage helps stay under 15A limits
- ✅ Hemlock frame and screws included
- ✅ Works for both new builds and replacements
Cons:
- ❌ Controller and plug are your job
- ❌ Less coverage per panel than the 300W plate
Price tier: budget. Good value when your circuit is the bottleneck.
6. iDOTODO 150W Carbon Plate — compact plate for calves and tight corners
This is the small one: 25.19″ x 13.38″ x 1.18″. It’s built for targeted heat, such as a spot low on the front wall, under the bench, or wherever the larger plates won’t fit.
In a closet, calves and feet are the usual cold zone. A 150W plate aimed there adds comfort without major circuit load. A 220V version exists too, so confirm voltage on the listing before ordering.
Reviewer sentiment: one roundup reports an average around 4.5 stars with praise for fast heating and easy installation. I couldn’t independently verify that, and the roundup’s wording reads promotional, so take it as a loose signal at best.
Pros:
- ✅ Fits where full-size plates can’t
- ✅ Low load for supplemental zones
- ✅ Available in 120V and 220V versions
Cons:
- ❌ Too small to be a primary heat source
- ❌ No controller or plug included
Price tier: budget. It earns its keep as a helper, not a hero.
7. Woanger 350W Carbon Fiber Glass Tube Panels — tube-style option in multi-piece sets
The standout is the tube format. Each heater is a carbon fiber glass tube with a reflector and protective mesh, sold in sets of one, two, or four. Listings say no plug and no controller, so this is another component play.
Tubes concentrate heat in a narrower footprint than flat plates. Flat carbon plates tend to spread far-infrared across a broad area, per Haven of Heat’s description of them. So tube layouts need more thought about spacing to avoid hot spots. The mesh is worth leaving untouched.
Four tubes at 350W total 1,400W, or about 11.7A at 120V. That stays just under the 12A continuous ceiling of a 15A circuit, assuming your voltage matches. Confirm it on the listing.
Reviewer sentiment: I couldn’t verify review text, so I’m leaving that to your own reading of the listing.
Pros:
- ✅ Multi-piece sets for building out a layout
- ✅ Reflector and mesh included
- ✅ High per-unit output
Cons:
- ❌ Less even coverage than flat plates
- ❌ No controller, no plug, voltage needs checking
Price tier: budget to mid-range. Best for builders replacing tubes or who prefer that format.
✨ Don’t Miss These Exclusive Deals!
🔍 Take your closet sauna project to the next level with these carefully selected panels. Click on any highlighted item to check current pricing and availability. These tools will help you build a warm, reliable retreat you’ll actually use!
Panel Placement Layout: Where Each Panel Should Go
Layout beats raw wattage. One build guide cited by The Architect’s Diary argues that placement matters more than total wattage because heater dose falls off with distance. That makes sense. A panel two feet from your back works harder than one four feet away.
Haven of Heat’s guidance for a 4′ x 4′ x 7′ build (112 cubic feet, the popular two-person size) is five or six 300W panels, mostly on the back and side walls. A front-wall or under-bench panel covers the calves and front of the body. Ceiling panels are less common in DIY builds.
For a 3′ x 4′ closet, here’s a reasonable starting layout based on that logic:
- Stack two panels on the back wall to cover lower back to shoulders.
- Mount one panel on each side wall at seated torso height.
- If you add a fifth, put a small plate low on the front wall for calves.
- Keep ceilings in the 75-84 inch range for even heat distribution.
A closet 36 inches wide fits one 20-inch-wide panel across, so stack vertically rather than side by side. And never cover the panel faces. Sunlighten’s installation manual says as much.
Prefer a rule of thumb? Haven of Heat’s collection page suggests about 100W per 10 cubic feet, which would put an 84-cubic-foot closet at three or four panels. The seller’s panel package uses the more generous 15W per cubic foot. Closets leak heat through doors and thin walls, so lean toward the higher number.
Wiring and Thermostat Setup: Circuits, Controllers, and Safe Hookup
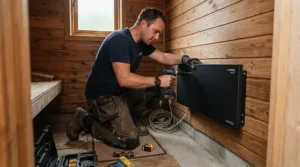
This is where DIY ambition meets the National Electrical Code. I’m not an electrician, and this section is orientation, not instructions. The NFPA’s page on the NEC explains that the code is enforced in all 50 states, and your local authority decides the rest.
| Panel Count (300W each) | Circuit | Wire |
|---|---|---|
| 1-4 panels | 120V / 15A | #14 AWG |
| 5-6 panels | 120V / 20A | #12 AWG |
| 7-12 panels | 240V / 20A with contactor box | #12 AWG |
These figures come from Haven of Heat’s panel package guidance. The logic holds up: 1,500W at 120V pulls 12.5A, which exceeds the roughly 12A continuous limit of a 15A circuit. That’s why five panels jump to 20A. In short, count amps before you buy panels.
Key points to carry into your electrician conversation:
- Dedicated circuit. Sauna sources agree that infrared panels should not share a circuit with other appliances.
- GFCI. One source says the NEC requires GFCI protection on sauna circuits, especially in bathroom-type locations. Confirm with your inspector.
- Low-EMF wiring. Saunafin’s rough-in guide suggests BX armored cable rather than Romex if you’re trying to keep EMF low.
- Permits. New circuits, especially 240V, typically require an electrical permit. Plugging into an existing outlet usually doesn’t.
On thermostats: a mechanical timer (like the Haven of Heat 120V Carbon Panel Package includes) is dependable but blunt. A digital controller, like the WiFi touchscreen in the Finnmark Spectrum+ Ceramic Kit, adds setpoints up to 170°F and 60-minute sessions. For component panels like the iDOTODO 300W Carbon Plate, plan the controller as a separate purchase.
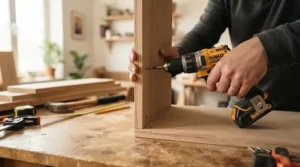
Plywood Sauna Frame: Building the Shell Around Your Panels
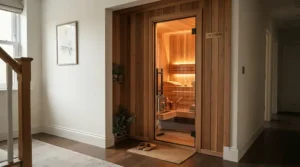
A closet conversion is the lowest-effort path because the walls are already framed. Haven of Heat’s build guide calls it the most economical option and notes you typically have a circuit nearby. Still, you’ll likely add blocking, insulation, and a lining.
Where does a plywood sauna frame fit? Here’s my reasoning, not a tested standard. Plywood works well as structural backing, giving screws something solid to grab for panels and benches. The risk is exposure. Adhesives in some plywood can give off odors when warmed. So keep plywood behind sauna-grade wood lining, or choose exterior-grade or low-emission sheets, and ask the panel maker about acceptable surfaces.
Rules worth following from the guides:
- Do not use vapor barriers or standard drywall inside the sauna space.
- Insulate for heat retention, since closets leak warmth through thin walls.
- Leave a small passive vent or a gap at the bottom of the door for air exchange.
- Respect panel clearances. The recessed Finnmark Spectrum+ Ceramic Kit needs 3 inches of cavity.
- Frame for headroom of 75-84 inches.
Frame around the panels you choose, not the other way around. Panel dimensions drive everything.
DIY Infrared Sauna Build Kit vs Buying Panels Separately
A diy infrared sauna build kit trades flexibility for certainty. Haven of Heat puts a full ground-up DIY build at roughly $2,000-$6,500 in materials, versus $7,000-$12,000+ professionally installed. The Architect’s Diary cites a wider $3,000 to $20,000 range and says DIY saves 30-40% over prefab only if you already know what you’re doing. Both are vendor or blog figures, so treat them as ballparks.
| Route | What You Get | Skill Needed | Best For |
|---|---|---|---|
| Complete panel kit (Finnmark Spectrum+ Ceramic Kit, Haven of Heat 120V Carbon Panel Package) | Panels, controller, power parts | Moderate | First-time closet builders |
| Loose panels (iDOTODO 300W Carbon Plate, iDOTODO 250W Carbon Crystal Panel, Woanger 350W Carbon Fiber Glass Tube Panels) | Heaters only | High | Experienced DIYers |
| Prebuilt cabin | Complete room | Low | Renters, no framing |
Looking at the table, kits cost more per panel but save you from compatibility guesswork. Loose panels win on price only if you can wire a controller correctly. For most people, the extra spend on a kit buys back hours and reduces risk. If you’re new to electrical work, a kit plus an electrician beats loose panels plus improvisation.
How to Choose Infrared Heater Panels for Home Sauna
Choosing infrared heater panels for home sauna use comes down to seven decisions. Here they are in order.
- Measure cubic feet. Multiply width x depth x height. A 3′ x 4′ x 6′ closet is 72 cubic feet.
- Pick a wattage rule. Use 15W per cubic foot as a minimum, or around 10W if your closet is tightly insulated.
- Match voltage to your panel. If you can’t run a new circuit, stay at 120V and 1-4 panels, or 5-6 with a 20A line.
- Decide on a controller. Mechanical timers are simple, and digital controllers offer setpoints.
- Check certifications. Look for UL or ETL marks on elements and power supplies.
- Choose a mounting style. Surface-mount is easier for finished walls, and recessed saves depth.
- Check recalls and warranty. Search CPSC before buying any brand.
Skip any step and you’ll feel it later. Wrong voltage tops the list of expensive surprises.
Real-World Scenarios: Three Closet Builds
These are hypothetical profiles, not testimonials.
The 3′ x 4′ bedroom closet, tight budget. At 84 cubic feet with an existing 15A circuit, this builder needs four 300W panels at most, about 1,200W. The Haven of Heat 120V Carbon Panel Package fits cleanly, mechanical timer and all. If they’d rather save money and can wire a controller, four iDOTODO 300W Carbon Plates also fit under the 12A limit.
The 4′ x 4′ basement closet, finish-focused. Basements stay cool, and Haven of Heat’s guide notes easy access to electrical panels. This builder wants a clean look and can open stud bays. The Finnmark Spectrum+ Ceramic Kit with its recessed panels and WiFi controller fits, using a 20A cable.
The garage-nook tinkerer. Odd dimensions and a hands-on streak. Mixing a few iDOTODO 250W Carbon Crystal Panels with a iDOTODO 150W Carbon Plate for the calf zone lets them fine-tune load. They hire an electrician for the controller and circuit sign-off.
The pattern: match the product to your skill and circuit, not to the spec sheet’s biggest number.
Common Mistakes When Buying Infrared Sauna Panels
Experienced builders and vendor guides flag the same errors again and again:
- Undersizing wattage. Haven of Heat calls panel count the step most builders get wrong.
- Ignoring the circuit. Five 300W panels need a 20A line, not 15A.
- Assuming plug-and-play. Several panels, including the iDOTODO 300W Carbon Plate and Woanger 350W Carbon Fiber Glass Tube Panels, ship without a plug or controller.
- Sealing the room too tightly. Skip the vent and the closet gets stuffy.
- Using vapor barrier or drywall inside the sauna space.
- Trusting “low EMF” labels blindly. Ask where the reading was taken. One guide says measurements should be at the seating position, not 12 inches from the panel.
- Skipping the recall check.
The cheapest mistake to avoid is the last one, and it takes two minutes.
Carbon vs Ceramic Panels: Features That Actually Matter
Carbon panels are the DIY default. Haven of Heat says carbon is the better all-around choice for most builds, delivering broad, even far-infrared across a large surface. Ceramic panels like the Finnmark Spectrum+ Ceramic Kit are more localized and, in that line, work with traditional heaters for a hybrid room.
EMF deserves calm context. One vendor guide sorts sauna panels into tiers: low (6-10 mG), ultra low (under 3 mG), and near zero (under 2 mG), measured at contact points. Those are vendor-defined categories. Another guide notes carbon panels generally produce lower EMF than ceramic when designed well, because balanced wiring cancels magnetic fields. Independent test results beat any label.
Features that matter: certifications, controller quality, warranty, and mounting style. Features that don’t: Bluetooth speakers, mood lighting, and spec-sheet superlatives you can’t verify.
Long-Term Cost and Maintenance
A 1,200W build running 45 minutes uses about 0.9 kWh. At typical U.S. electricity rates (an assumption, so check your bill), that’s pennies to a quarter per session. Operating cost is rarely the issue.
Maintenance is light. Panels are modular, and Haven of Heat notes that individual panels can be swapped without replacing the whole system. The Finnmark Spectrum+ Ceramic Kit lists 30,000+ hours of rated life, which at one hour a day is decades on paper. Real lifespans depend on installation quality.
A simple routine: check connections and wire insulation yearly, wipe wood with a damp cloth, keep panel faces clear, and re-test the controller’s shutoff. Budget more for the electrician than for the panels’ lifetime upkeep.
Safety, Regulations, and the Recall Reality Check
Safety isn’t a footnote with heating elements. On September 17, 2026, the CPSC announced a recall of Sauna360 infrared saunas, hybrid saunas, and IR kits with panels. The hazard was that the panels can short circuit and overheat. Coverage cites 67 reports of overheating, melting, charring or burning, with no injuries reported. The list includes custom and semi-custom IR kits sold under Saunatec, Tylö, and Helo, plus Finnleo models.
None of the seven products in this article appeared in the recall details I retrieved. But recalls update, so check the CPSC site before buying any brand.
Other basics:
- Electrical permits are typically required for new circuits, especially 240V.
- Sunlighten’s manual recommends professional installation and permits, and warns never to leave a sauna unattended or cover panels.
- Bedroom closets may face extra code requirements around egress and fire safety.
- Talk to your doctor before regular sauna use, especially with heart conditions.
What to Expect: Real-World Performance
Expect a warm, dry, gentle heat at 120-150°F rather than a blast-furnace experience. Sessions feel closer to lounging in strong sun than sitting in a Finnish steam room.
On health, calibrate your expectations. A 2009 review in Canadian Family Physician found limited evidence for blood pressure and heart failure benefits, with small, short studies. Wikipedia’s overview adds that many popular claims lack evidence entirely. Relaxation and warmth are real. Miracle detoxes aren’t well supported.
The practical takeaway: build the sauna because you like sitting in warm, quiet heat. Anything beyond that is a bonus you shouldn’t pay a premium for.
FAQ
❓ How many infrared sauna panels do I need for a closet?
❓ Can I plug infrared sauna panels into a normal outlet?
❓ Do I need an electrician for diy infrared sauna wiring?
❓ Is plywood safe for a sauna frame?
❓ What temperature should I set the sauna thermostat to?
Conclusion
Closet conversions are the friendliest way into a home infrared sauna, and the right panels make the difference between a joyful ritual and an expensive warm cupboard. Here’s the short version of what the research supports.
If you want the simplest path, start with the Haven of Heat 120V Carbon Panel Package. If you want polish and a warranty, the Finnmark Spectrum+ Ceramic Kit is the premium route, and the Finnmark Spectrum Carbon Kit suits larger closets with 240V already planned. Budget builders with wiring skills can look at the iDOTODO 300W Carbon Plate, the iDOTODO 250W Carbon Crystal Panel, and the iDOTODO 150W Carbon Plate, or the tube-style Woanger 350W Carbon Fiber Glass Tube Panels, but plan for the controller and the electrician.
Whatever you pick, do the unglamorous things well. Count your amps, leave a vent, keep panel faces clear, check the recall list, and pull the permit if your city wants one.
Recommended for You
- Near Infrared Sauna for Skin and Wrinkles: 7 Best Picks 2026
- Full Spectrum Infrared Sauna for Muscle Recovery: 7 Best Picks 2026
- Two Person Far Infrared Sauna for Apartment Living: 7 Best Picks 2026
Disclaimer: This article contains affiliate links. As an Amazon Associate, I earn from qualifying purchases. If you purchase products through these links, we may earn a small commission at no additional cost to you.
✨ Found this helpful? Share it with your friends! 💬🤗
